

Lightroom CC Calibration (Mobile Install)
This is EXACTLY the same preset pack but provides .dng files that you can use to install the settings directly on your iPad/Tablet/Phone without using a desktop computer. Please be aware the installation process is more tedious and if you do have a desktop I highly recommend installing that way. This pack will include both the .dng files used for installing on mobile and the original preset files used for installing on a desktop. Instructions on how to install are down below.
There are a few missing features within Lightroom Mobile that still haven’t been moved from the desktop version, Lightroom Classic. One of those missing features is the calibration panel which many people might not even use but after releasing my video on the calibration panel I had people ask about how to do such a thing in Lightroom Mobile.
I’ve discovered that these settings actually exist in Lightroom Mobile but they are hidden and there are no ways to manipulate or change the settings directly in the program. I’ve developed a workaround by creating the settings within Lightroom Classic and saving them as presets within Lightroom Mobile. You can find out how to do this yourself and everything about this process in my video on the topic here.
Essentially this pack is replicating what the calibration panel does to your images within Lightroom Classic at different values. 99% of the time I simply turn my Blue Saturation up to +100 but I’ve included 11 other settings that give you a bit more creative control.
Included Settings
Blue Saturation @ +35, +65, +100, Blue Hue -100 / Saturation +100,
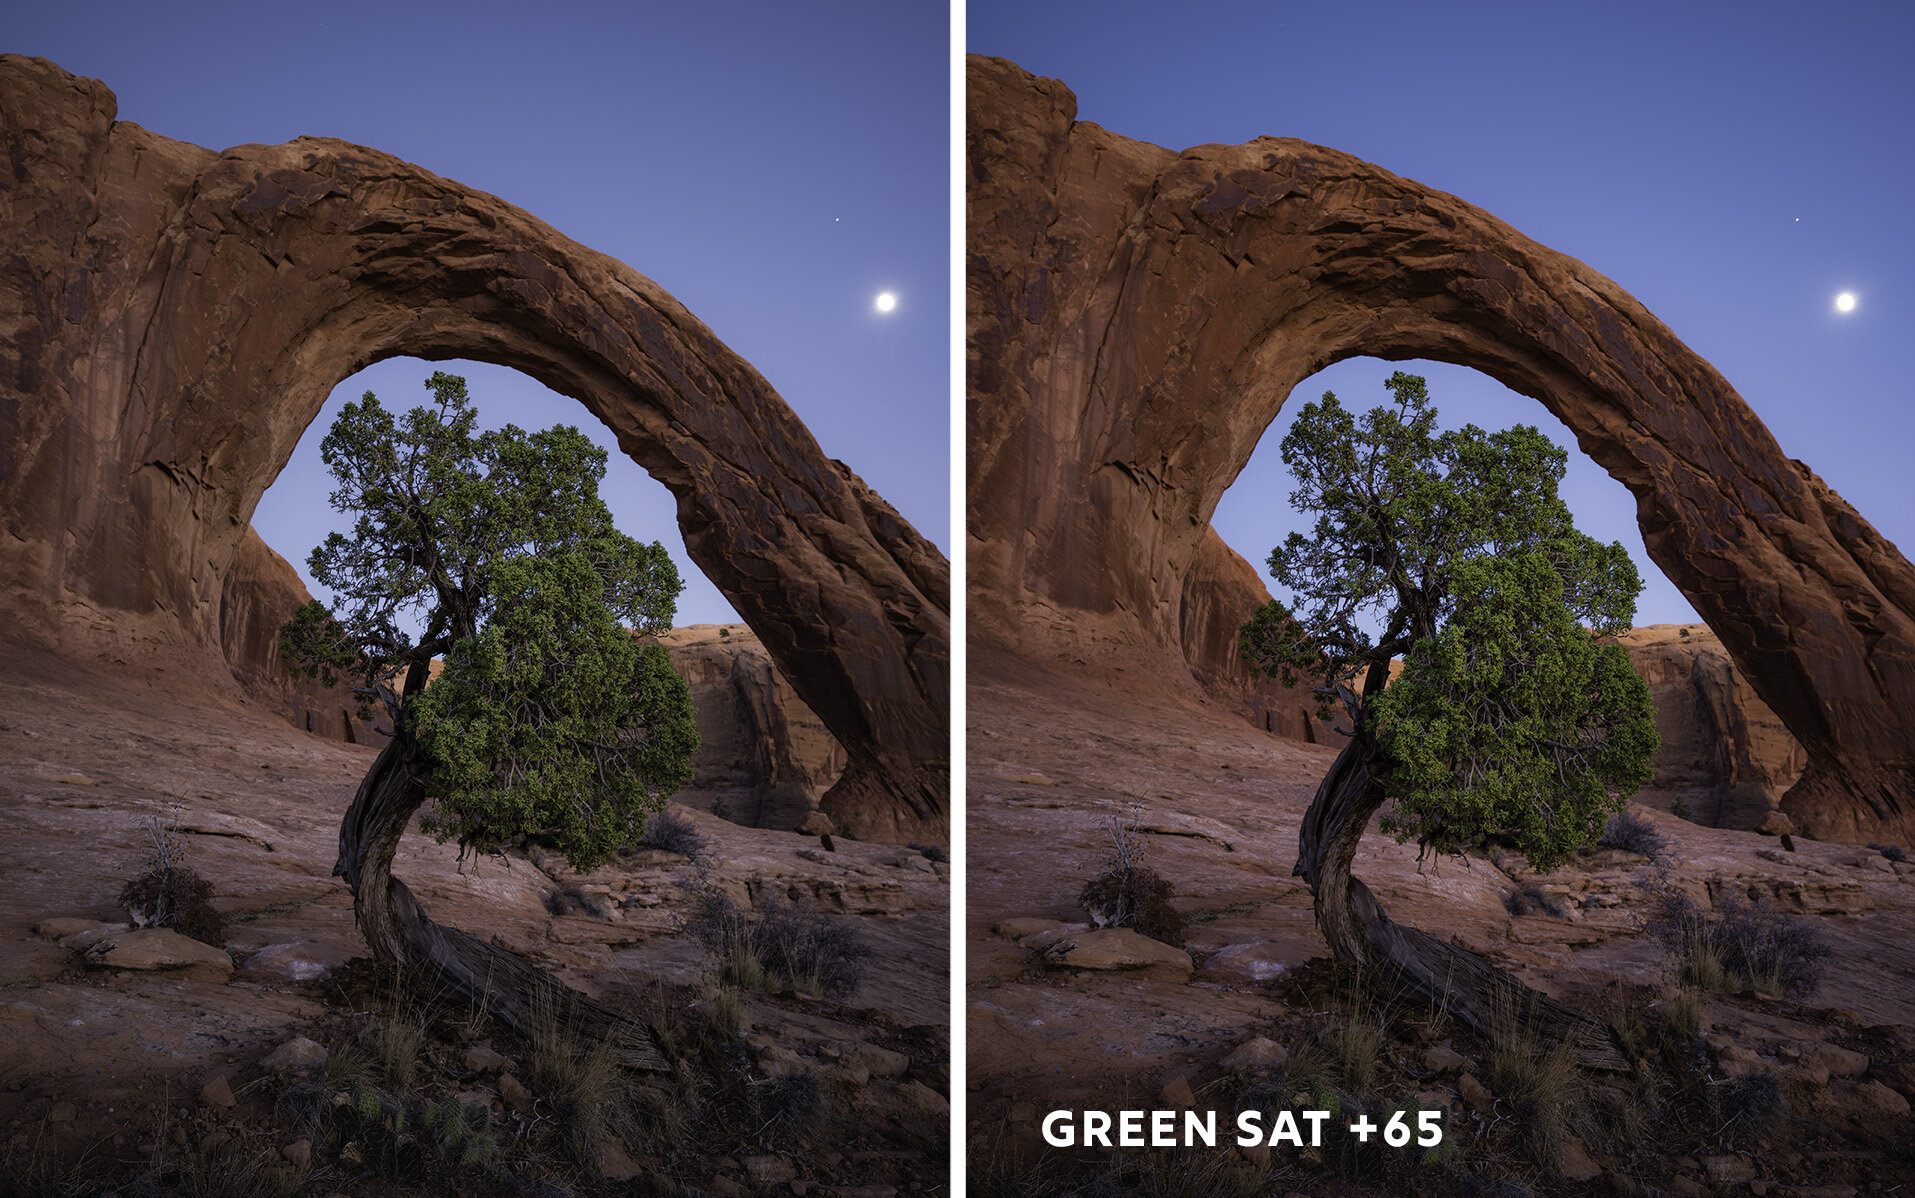
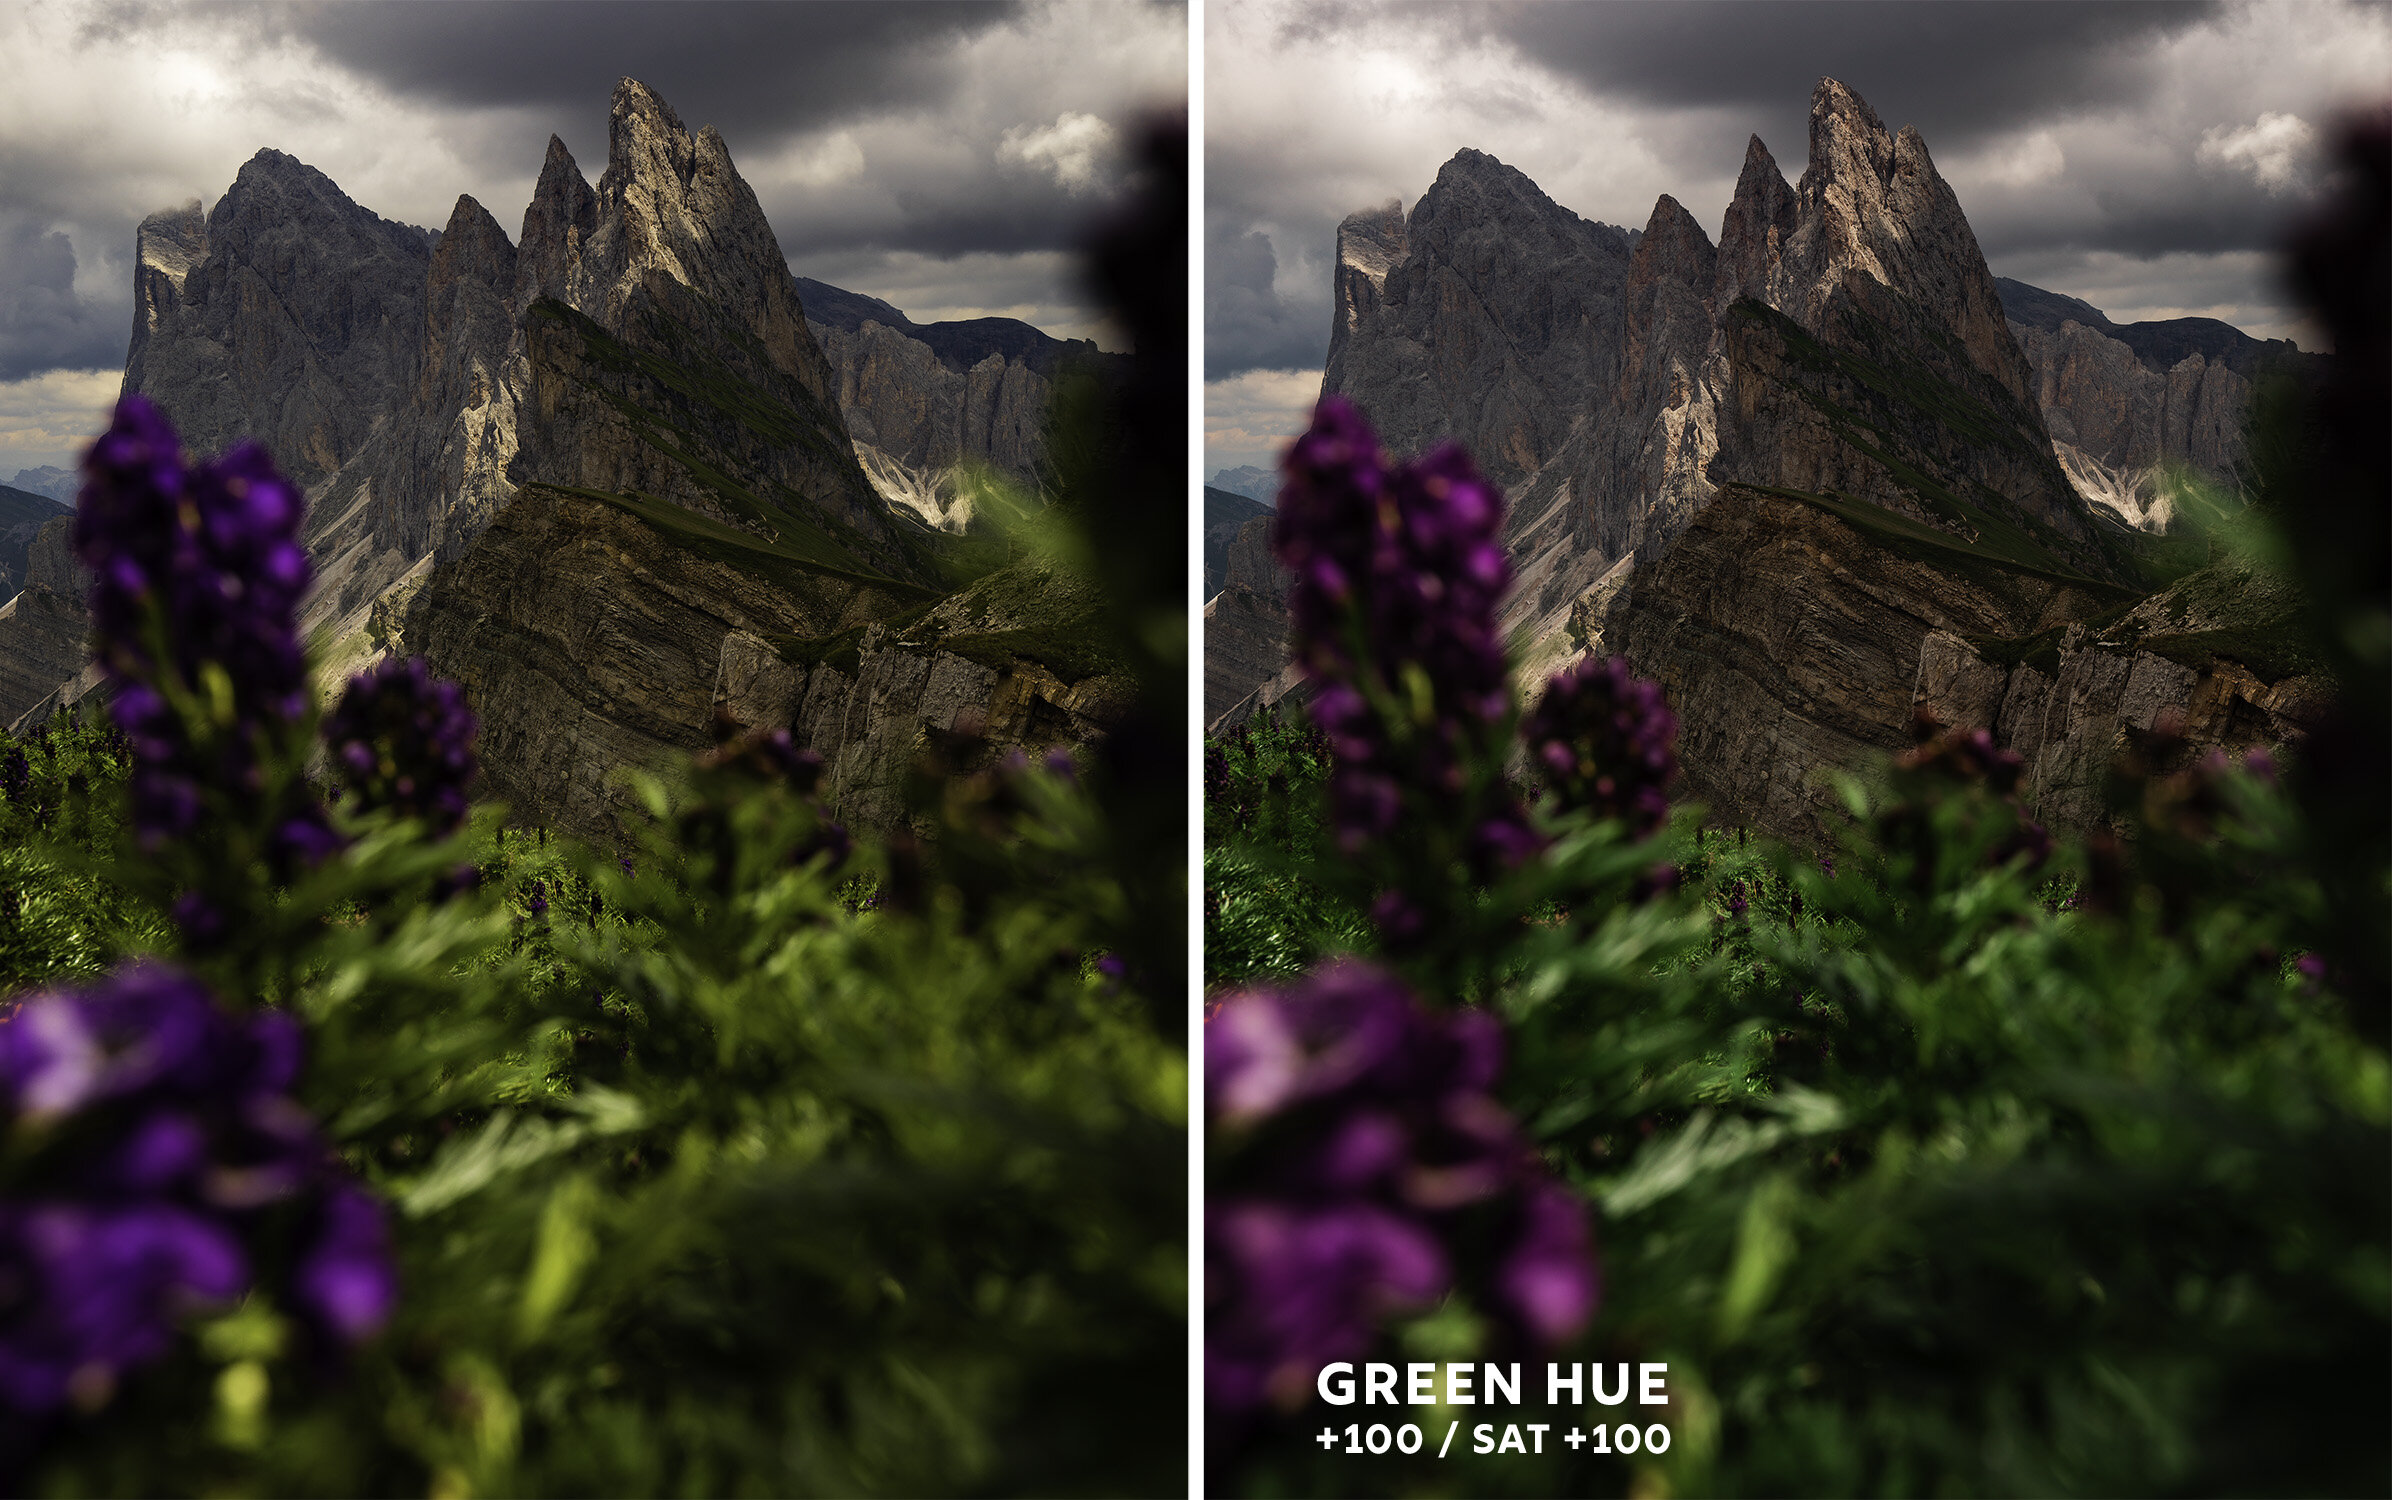
Green Saturation @ +35, +65, +100, Green Hue +100 / Saturation +100,
Red Saturation @ +35, +65, +100, Red Hue +100 / Saturation +100
This is NOT a set of presets that fully edits your photos. These presets should be applied first before you do your standard editing. These are made to give you the calibration panel settings without it actually existing in Lightroom Mobile. Also if you don’t fully understand the purpose of the Calibration settings please watch my video on using the panel to add magic to your images.
Installation Instructions for Mobile Install:
Throughout this tutorial I’ll being using an iPhone to guide you through installation. These steps should carry over to Android/iPad quite easily with the biggest difference being how and where files download to.
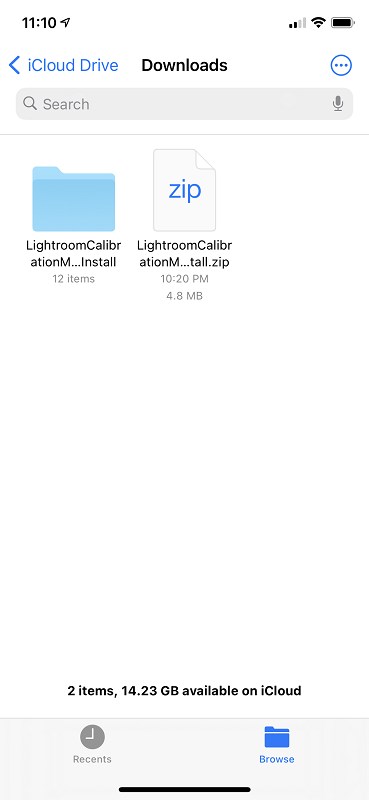
Step 1 - Download and Extract Files:
After purchase download the file on your device
Locate where you downloaded the file. In iOS it should go into your downloads folder in your iCloud Drive.
Open/extract the .zip file into a folder. Any relatively new install of iOS/Android should be able to do this automatically but if it doesn’t download an app such as iZip and use that to extract the files.
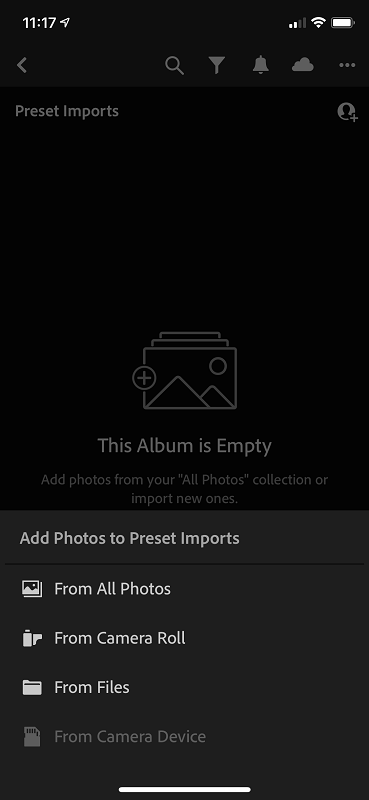
Step 2 - Open Lightroom and Create an Album:
Open up the Lightroom Mobile app
Create a new album by making sure you’re in the Library tab and use the “+” symbol.
I’ve named my album “Preset Imports” and I’ll be using it for any photos I add to my library to import presets from (if that isn’t obvious!)

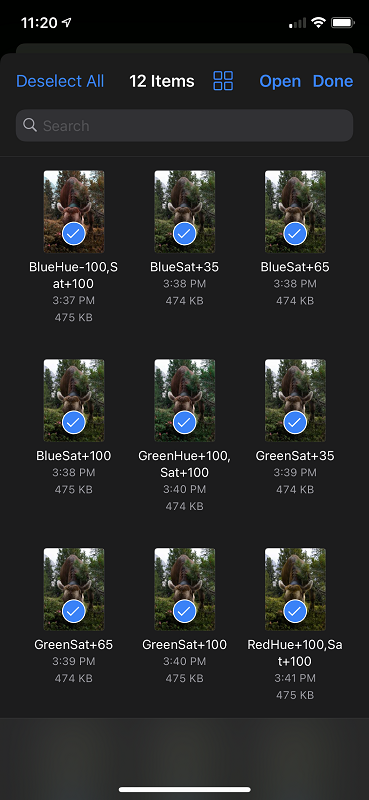
Step 3 - Import .DNG Images:
Make sure you’re in the album we just created
At the bottom right of your screen press the blue + sign (not the camera icon)
Select “from files” or “files”
Navigate to where you saved the files in Step 1. For me this is the Downloads folder
Once in the folder select the ellipsis (…) icon in the top and press “select”
Select all photos and press Open

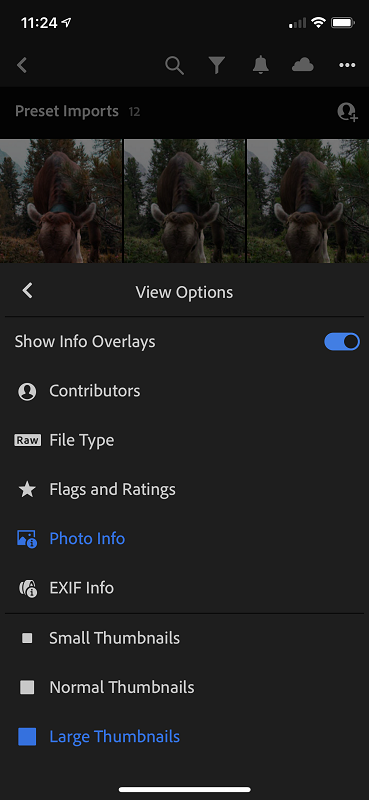
Step 4 - Create Presets
We will be opening each image one at a time and saving it’s settings as a preset for future use.
To see the names of the files press the ellipsis (…) icon and make sure “Photo Info” and “Large Thumbnails” are enabled. This will make it easier to tell what preset you are creating.
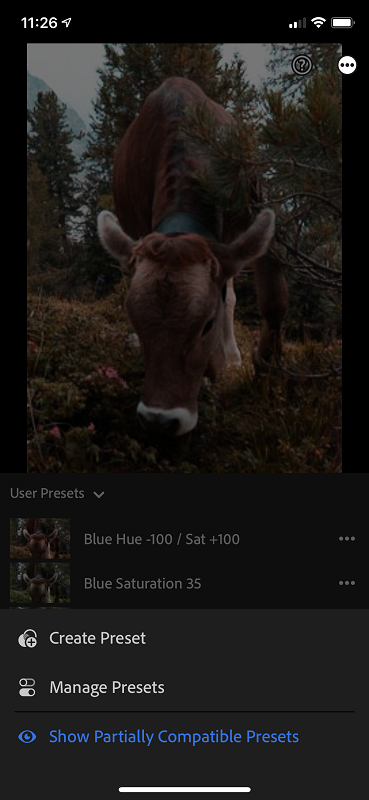
Open the first image and find the “Presets” button on the bottom panel.
Once again select the ellipsis (…) in the top right corner and select “Create Presets”
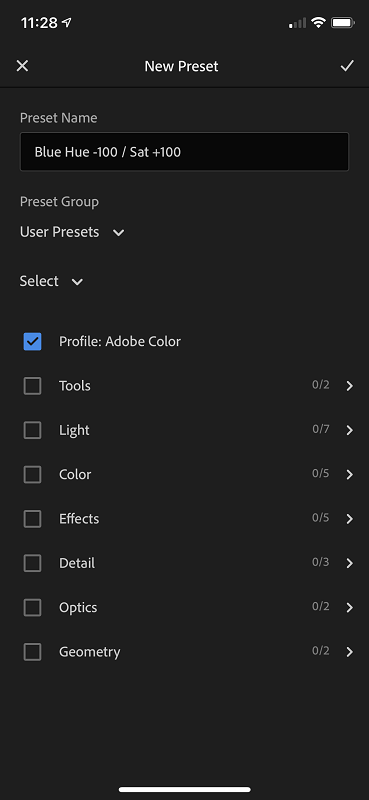
Name the preset according to the file name, in my case the first image is “Blue Hue -100 / Blue Sat +100”
Uncheck everything but Profile: Adobe Color and press the check mark in the top right corner
Repeat this process for every setting you’d like access to in the future.
Step 5 - Clean Up and Applying to Photos
Once you have created all the presets you can remove the photos from your library by deleting the folder or photos individually.
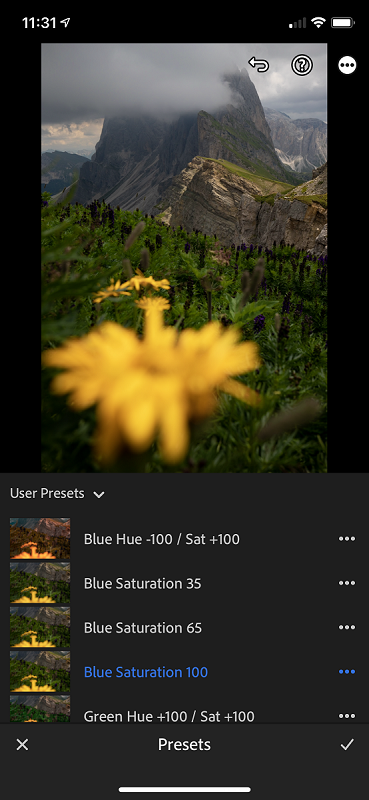
Navigate to a photo in your Library to test a preset
On the bottom panel scroll to presets
Make sure you have “user presets” selected in the drop down.
Test a calibration preset!
Thank You!
If you have any issues with this install or need some more resources please don’t hesitate to contact me using the contact form here on my website or just shoot me an email directly to alex@alexarmitage.com